You’ve got your shiny new window film and you’re ready to get to work. But wait! Do you know the proper window film installation techniques? This article will guide you through the process, ensuring you get the best results possible. From selecting the right product for your specific needs, to the application and maintenance, you’ll find everything you need right here.
Before you start, it’s crucial to prepare your workspace and materials. This can make the difference between a smooth, successful installation and a frustrating, time-consuming do-over. Follow along as we break down the steps for applying the film, removing any bubbles or creases, and ensuring the longevity and durability of your film. Let’s get started on your window transformation journey.
Selecting the Right Product for Your Needs
Choosing the perfect window film isn’t as complex as it seems, you’ve just gotta know what you’re looking for and why. The first thing you should consider is what your primary need is. Are you looking to reduce heat and glare? Maybe you’re aiming for increased privacy, or perhaps you’re after UV protection to prevent your furniture from fading. Understanding your specific needs will help you select the most appropriate product. Don’t forget to consider the aesthetic look you want to achieve as well, because window film can greatly affect the visual appeal of your space.
The next step is to carefully evaluate the different types of window films available in the market. You’ve got a plethora of options, from solar control films that help reduce energy costs to decorative films for beautifying your space. There are also safety and security films designed to hold glass together in case of breakage. Each type offers unique benefits, so it’s essential to match the product with your individual needs. Look for a reputable brand that provides high-quality products and guarantees longevity and durability.
Once you’ve narrowed down your options, consider the installation process. Some window films are easy to install and can be a fun DIY project, while others might require professional installation. Make sure you’re comfortable with the installation process of the film you choose. A poorly installed window film can lead to bubbles, peeling, and other issues that could affect its performance and lifespan. So, whether you’re doing it yourself or hiring a pro, ensure it’s done right for the best results with your chosen window film.
Preparation before Application
Before you dive into the task, it’s crucial to adequately prepare your workspace and materials to ensure a smooth and error-free application. Start by cleaning the window thoroughly. Use a mild detergent mixed with water and a soft cloth or sponge to remove any dust, dirt, or grime on the window surface. Afterward, dry the window completely with a lint-free cloth to prevent any debris from sticking to the film. As a tip, it’s best to work in a dust-free environment whenever possible. This cuts down on the likelihood of any particles getting trapped under the window film during installation.
Next, gather all the necessary tools and materials you’ll need for the job. These should include the window film, a sharp utility knife for trimming, a spray bottle filled with a solution of water and mild detergent, a squeegee, and a clean, lint-free cloth. Having everything within arm’s reach saves time and reduces the risk of errors. Additionally, consider laying out a drop cloth or newspapers around your workspace to catch any spills or drips.
Now that you’ve prepped your workspace and materials, take a moment to review the window film manufacturer’s instructions. These guidelines often contain specific tips and tricks for their particular product. Remember to measure the window and cut your film slightly larger than the window size. This extra space allows for any adjustments during the installation process. Take your time during this stage, as meticulous preparation is the key to a successful, bubble-free window film application.
Steps for Applying the Film
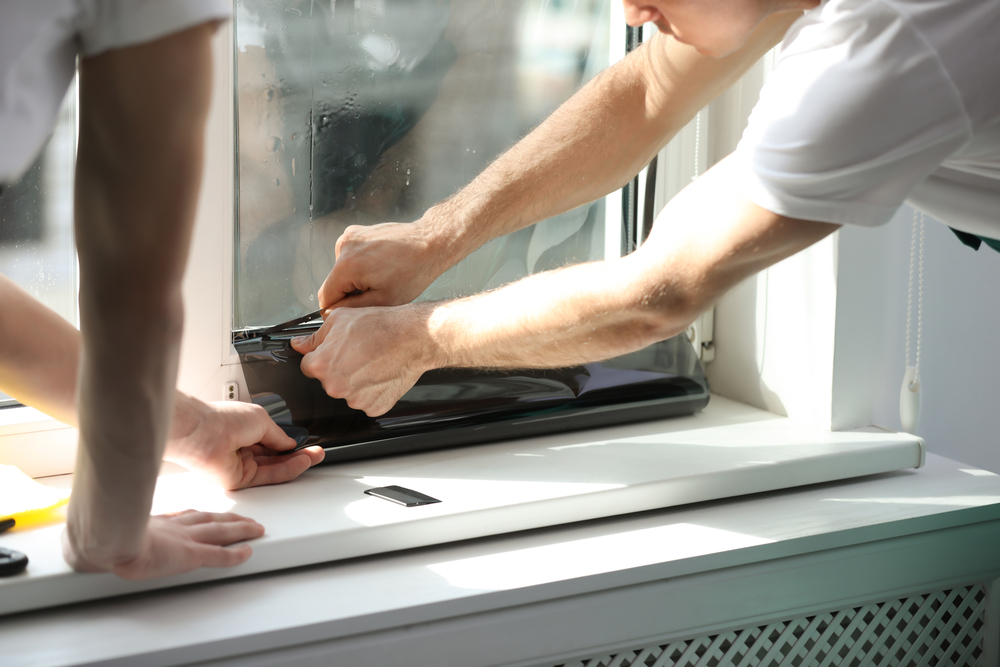
Alright, let’s delve right into the nitty-gritty of getting that film onto your glass! Once you’ve prepped your windows and have all your tools at the ready, it’s time to get down to business. First, remove the backing from your film. Be careful not to touch the sticky side to avoid leaving fingerprints. Then, apply the application solution generously to the window and the film. This will allow you to manoeuvre the film into place without it sticking immediately.
Next, you’ll want to position the film onto the glass. Start at the top and work your way down, smoothing out any bubbles or wrinkles as you go. It’s best to use a squeegee or a credit card for this task. Be gentle, though. You don’t want to damage the film. If you notice a bubble or a wrinkle that won’t budge, try lifting the film slightly and reapplying it. The application solution should provide enough slip to let you do this.
So you’ve got the film on the window and it’s looking pretty good, right? Not so fast. You’re not quite done yet. There’s still the matter of trimming excess film. For this, it’s best to use a sharp blade and a steady hand. Run the blade along the edge of the window frame to cut away any overhang. Remember to take your time with this step. Rushing could lead to a jagged edge or even a tear in your film. Once you’ve finished trimming, give the window one final squeegee to ensure the film is fully adhered and voila! You’ve mastered the art of window film installation.
Removing Bubbles and Creases
Despite your best efforts, you might still end up with a few pesky bubbles or creases in your freshly applied film. Don’t worry, though – it’s not the end of the world. All you need is a little patience and the right tools to smooth them out. The best tool for this job is a hard-card squeegee, which is specifically designed to remove bubbles from window film.
The process is pretty simple, but there’s a knack to it. Here’s a step-by-step guide to make it easier for you:
* Start by placing the edge of your squeegee at the center of the bubble or crease.
* Apply moderate pressure and move the squeegee towards the edge of the film. The idea is to push the trapped air or excess adhesive out from under the film.
* If the bubble or crease doesn’t disappear on the first try, don’t worry. Simply repeat the process until it does. But be careful not to apply too much pressure as it could damage the film.
Remember, practice makes perfect. You might not get it right the first time, but don’t let that discourage you. Just keep at it. And if you find that the bubbles or creases are being particularly stubborn, you can always use a heat gun or hairdryer to gently warm the film. This will make it more flexible and easier to smooth out. But be careful not to overheat it, as this can cause the film to shrink or warp. With a little patience and perseverance, you’ll soon have a perfectly smooth and bubble-free window film.
Ensuring Longevity and Durability of the Film
Ensuring your newly installed film lasts and remains durable isn’t a herculean task – it’s all down to how you maintain it. After the installation, you must give the film time to dry fully. This can take anywhere from a few days to a couple of weeks, depending on the type of film and the weather conditions. Don’t be alarmed if you notice a slight haziness or small water pockets during this time – they’ll disappear as the film dries. Avoid rolling down your windows or cleaning the film during this period to prevent any damage.
Next, let’s talk about cleaning. Once the film is completely dry, you’ll want to keep it clean to ensure its longevity. However, you need to be careful about the cleaning products you use. Avoid any cleaners that contain ammonia or abrasives as they can deteriorate the film over time. Instead, opt for soap and water or a cleaner specifically designed for window films. Use a soft cloth or a squeegee to gently clean the film, and remember to be gentle to avoid scratching or damaging it.
For the durability of the film, it’s important to keep in mind that although window films are made to withstand the elements, they’re not indestructible. Excessive heat and sunlight can cause the film to bubble or peel over time. Therefore, try to park your car in a shaded area whenever possible. Also, be cautious of any sharp objects that could potentially scratch or tear the film. Following these simple steps will help you maintain the longevity and durability of your window film, ensuring it keeps looking its best for years to come.